Introduction
Volume licenses allow partners to allocate licensed users across multiple customer accounts from a single license pool.
This article explains how to view volume license details, onboard new customers, search existing customer accounts, export license information, and update customer allocations.
This article uses MDR Complete as an example. The same workflow applies to MDR Core licenses.
Before You Begin
Before managing a volume license:
- Ensure you have access to the License Management Portal (LMP).
- Verify that customer accounts have already been onboarded, if applicable.
- Confirm that sufficient unallocated users are available before increasing customer allocations.
Access a Volume Licenses
- Sign in to the License Management Portal.
- Select Licenses.
- Choose the volume license you want to manage.
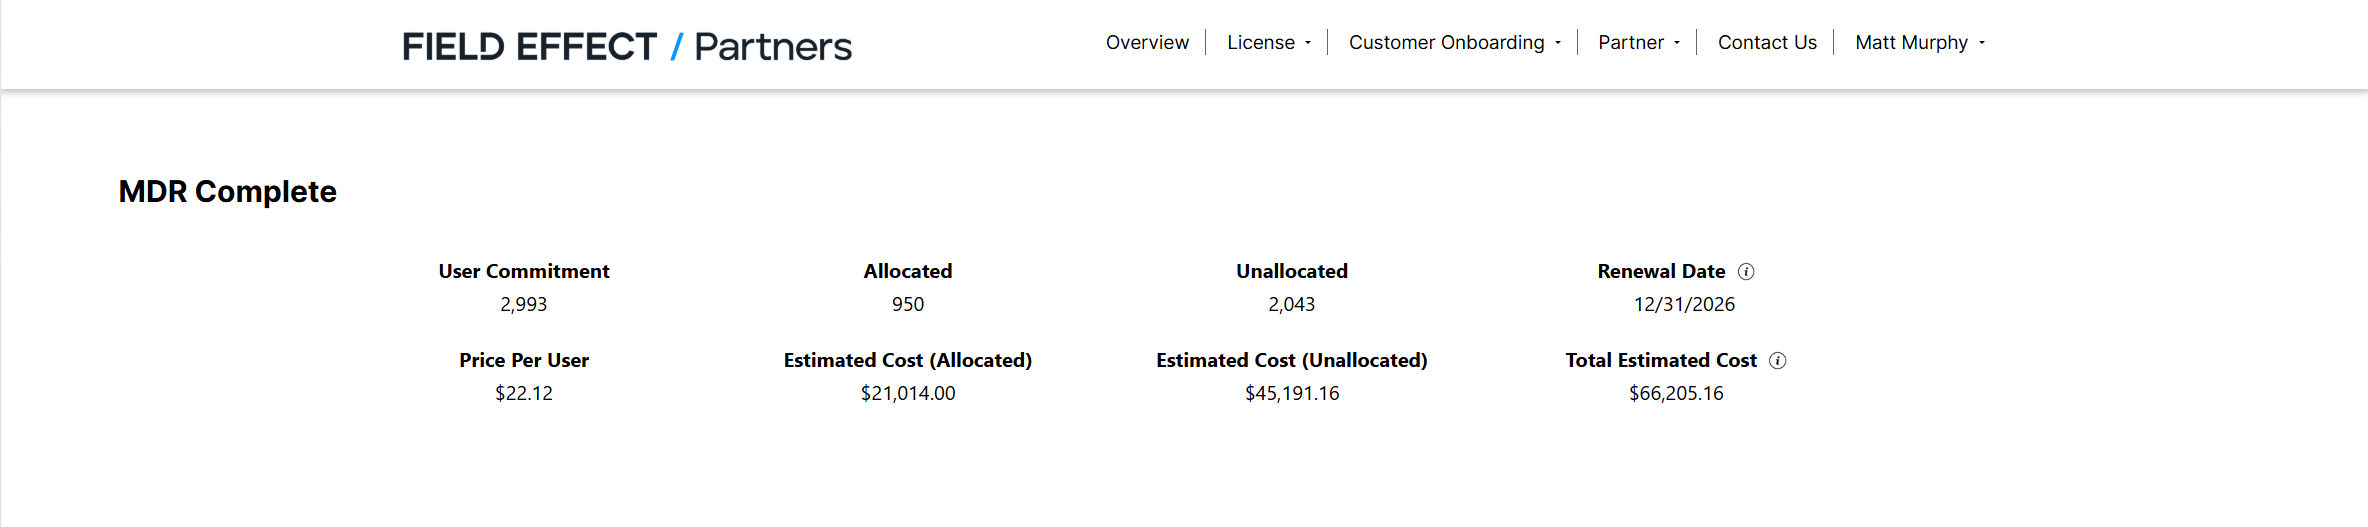
The license page opens and displays a summary of the selected license along with all customer accounts assigned to it.

View License Information
The top section of the page displays key information about your volume license, including:
- Total licensed users
- Allocated users
- Unallocated users
- Renewal date
- License pricing information
- Assigned customer accounts
Use this information to monitor license consumption and available capacity.
Add a New Customer
To onboard a new customer under the volume license:
- Open the volume license.
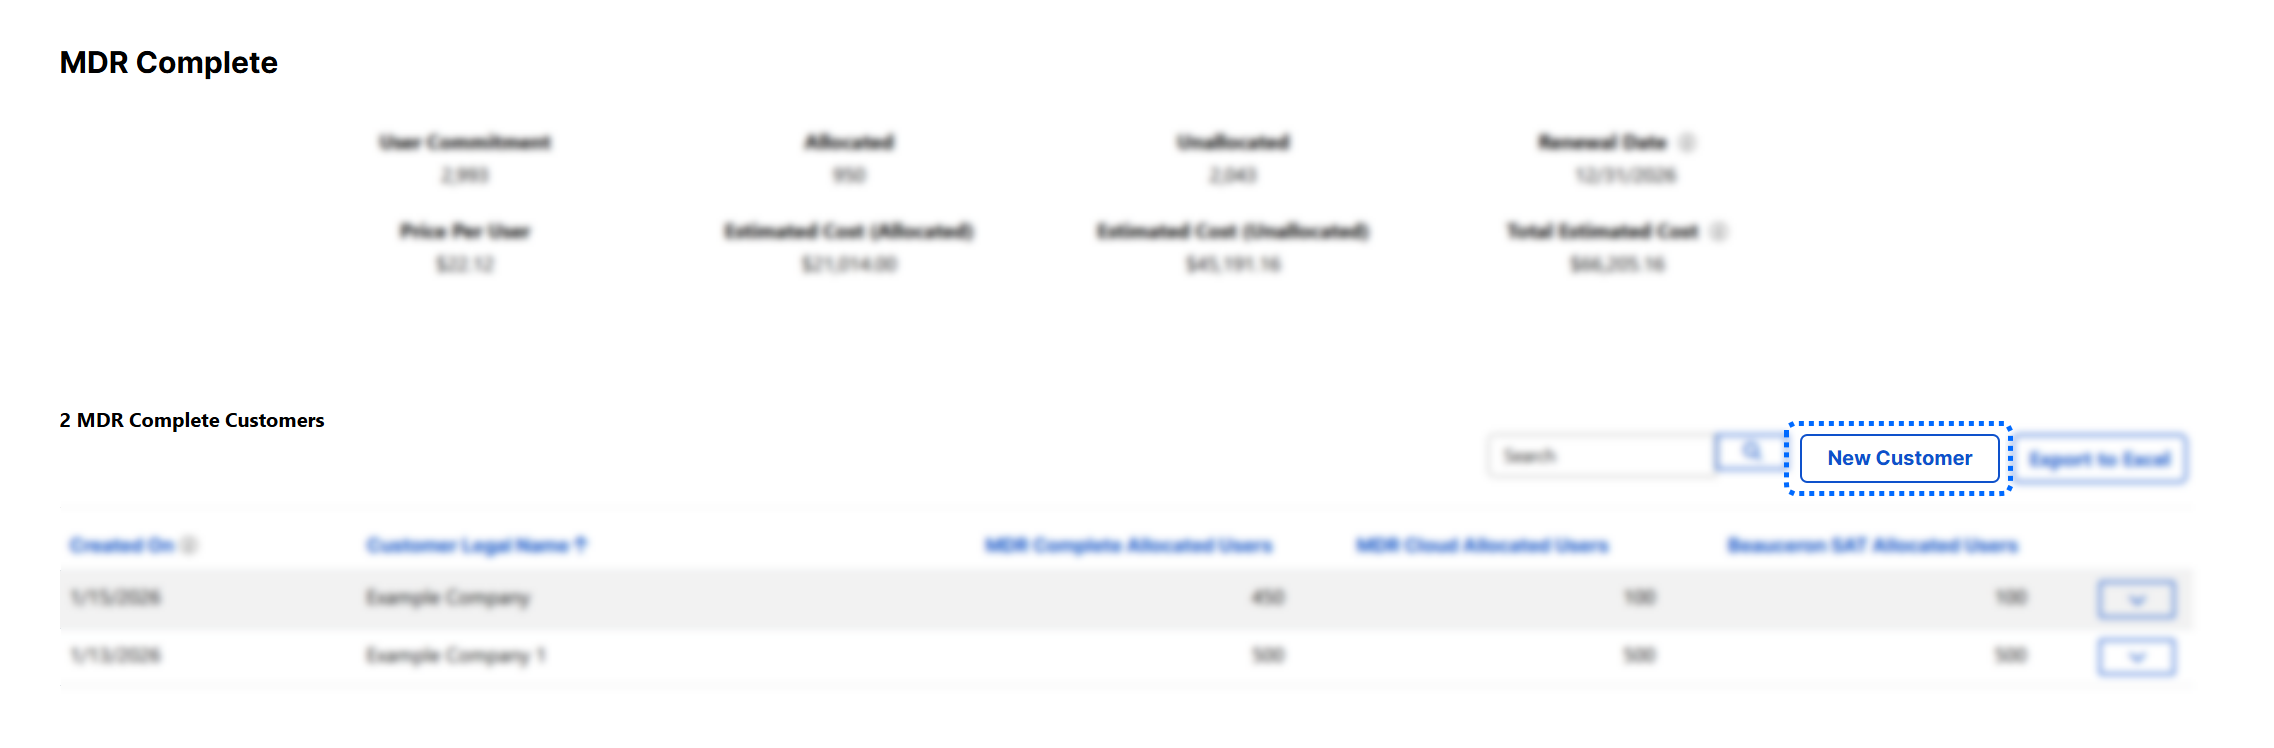
- Select New Customer.
- Complete the customer onboarding process.
- Assign the required number of licensed users.
- Submit the onboarding form.
After onboarding is complete, the customer appears in the customer table for the license. For detailed instructions, see Onboard a New Customer.
Search Customer Accounts
As your customer base grows, you can quickly locate a customer account using the search field above the customer table.
Enter part of the customer's:
- Company name
- Legal name
- Account information
The table updates to show matching results.

Export License Data
To download customer and license information:
- Open the volume license.
- Select Export to Excel.

The License Management Portal downloads a spreadsheet containing customer and license allocation data for the selected volume license.

Edit Customer Details & License Allocations
You can update the number of users assigned to a customer account when their licensing requirements change.
Update User Allocations
Before increasing a customer's allocation, verify that sufficient unallocated users remain in the volume license.
To edit a customer
- Open the volume license.
- Locate the customer in the customer table.
- Open the customer action menu.
- Select Edit.

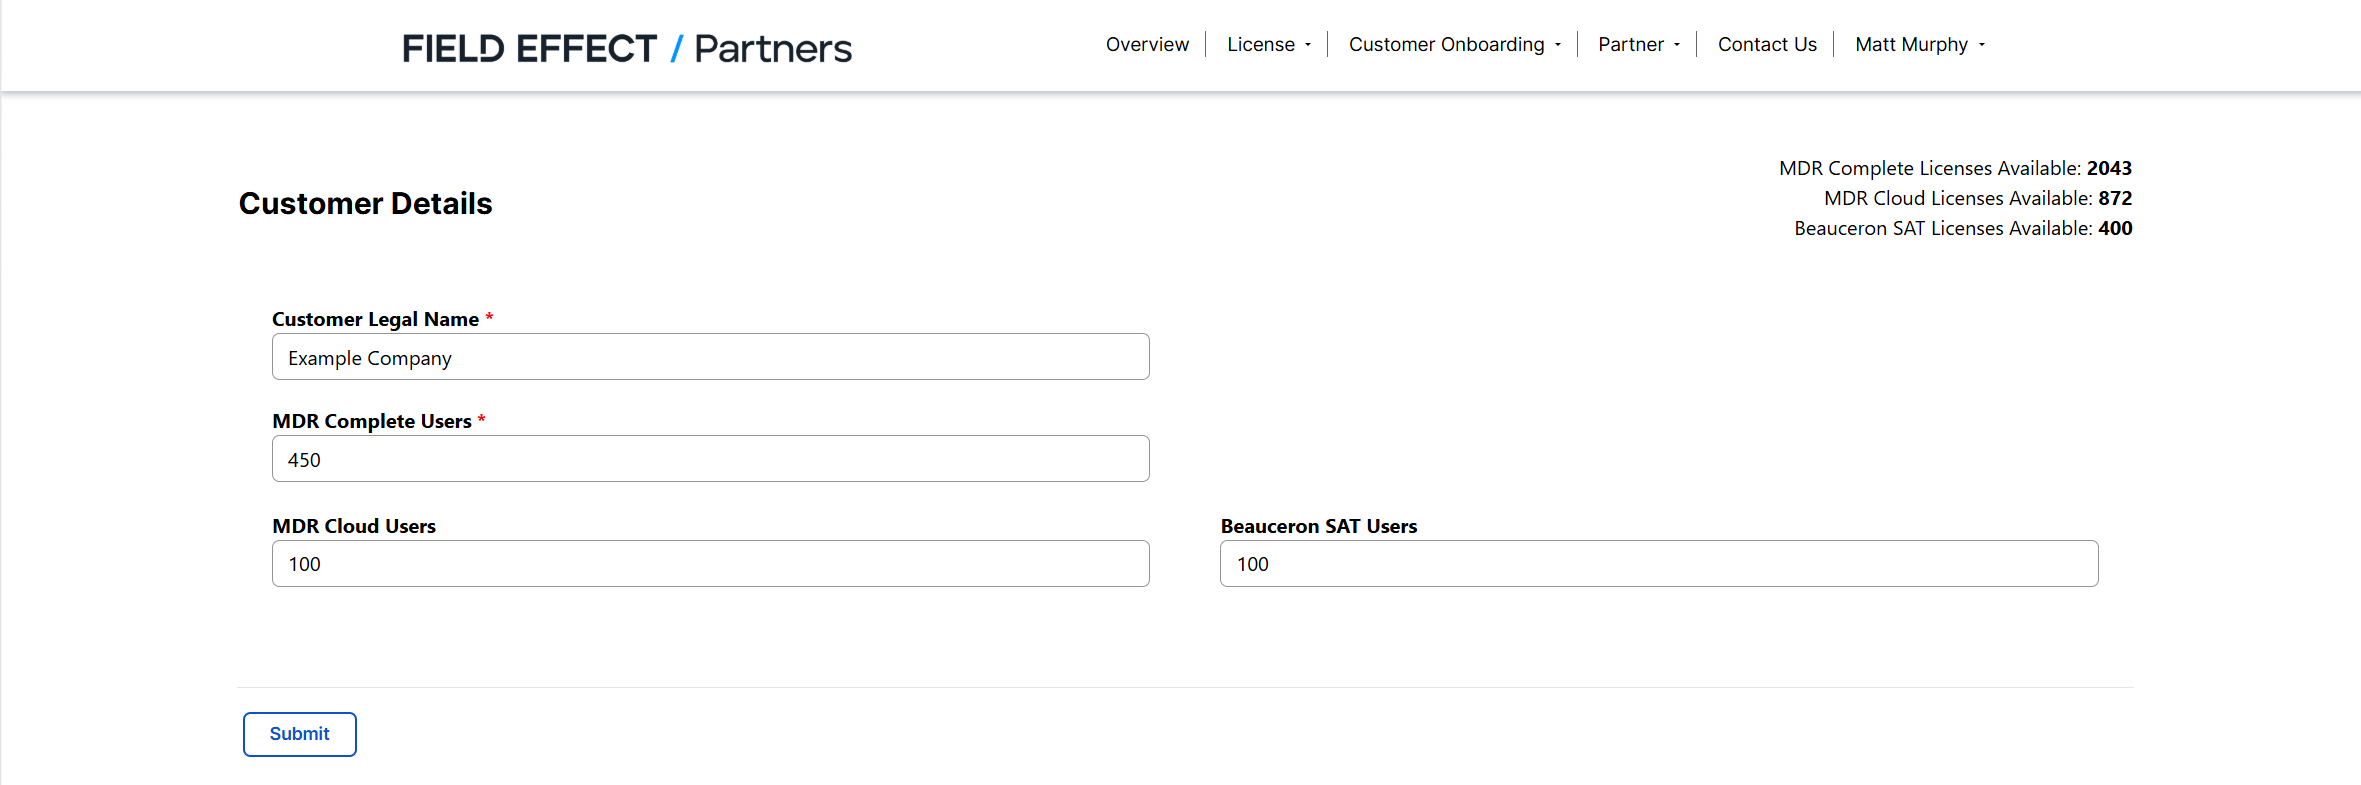
The customer account details page opens.
- Update the allocated users for the volume license.
- Adjust any associated cloud license allocations, if applicable.
- Review the remaining available users displayed on the page.
- Select Submit.
The License Management Portal saves your changes and returns you to the volume license page. The updated allocation is immediately reflected in the customer table and license totals.
Was this article helpful?
That’s Great!
Thank you for your feedback
Sorry! We couldn't be helpful
Thank you for your feedback
Feedback sent
We appreciate your effort and will try to fix the article