Introduction
Partners: endpoint agent preferences are set on a per-client basis. Ensure that the Organization Selector is set to the appropriate client before continuing.
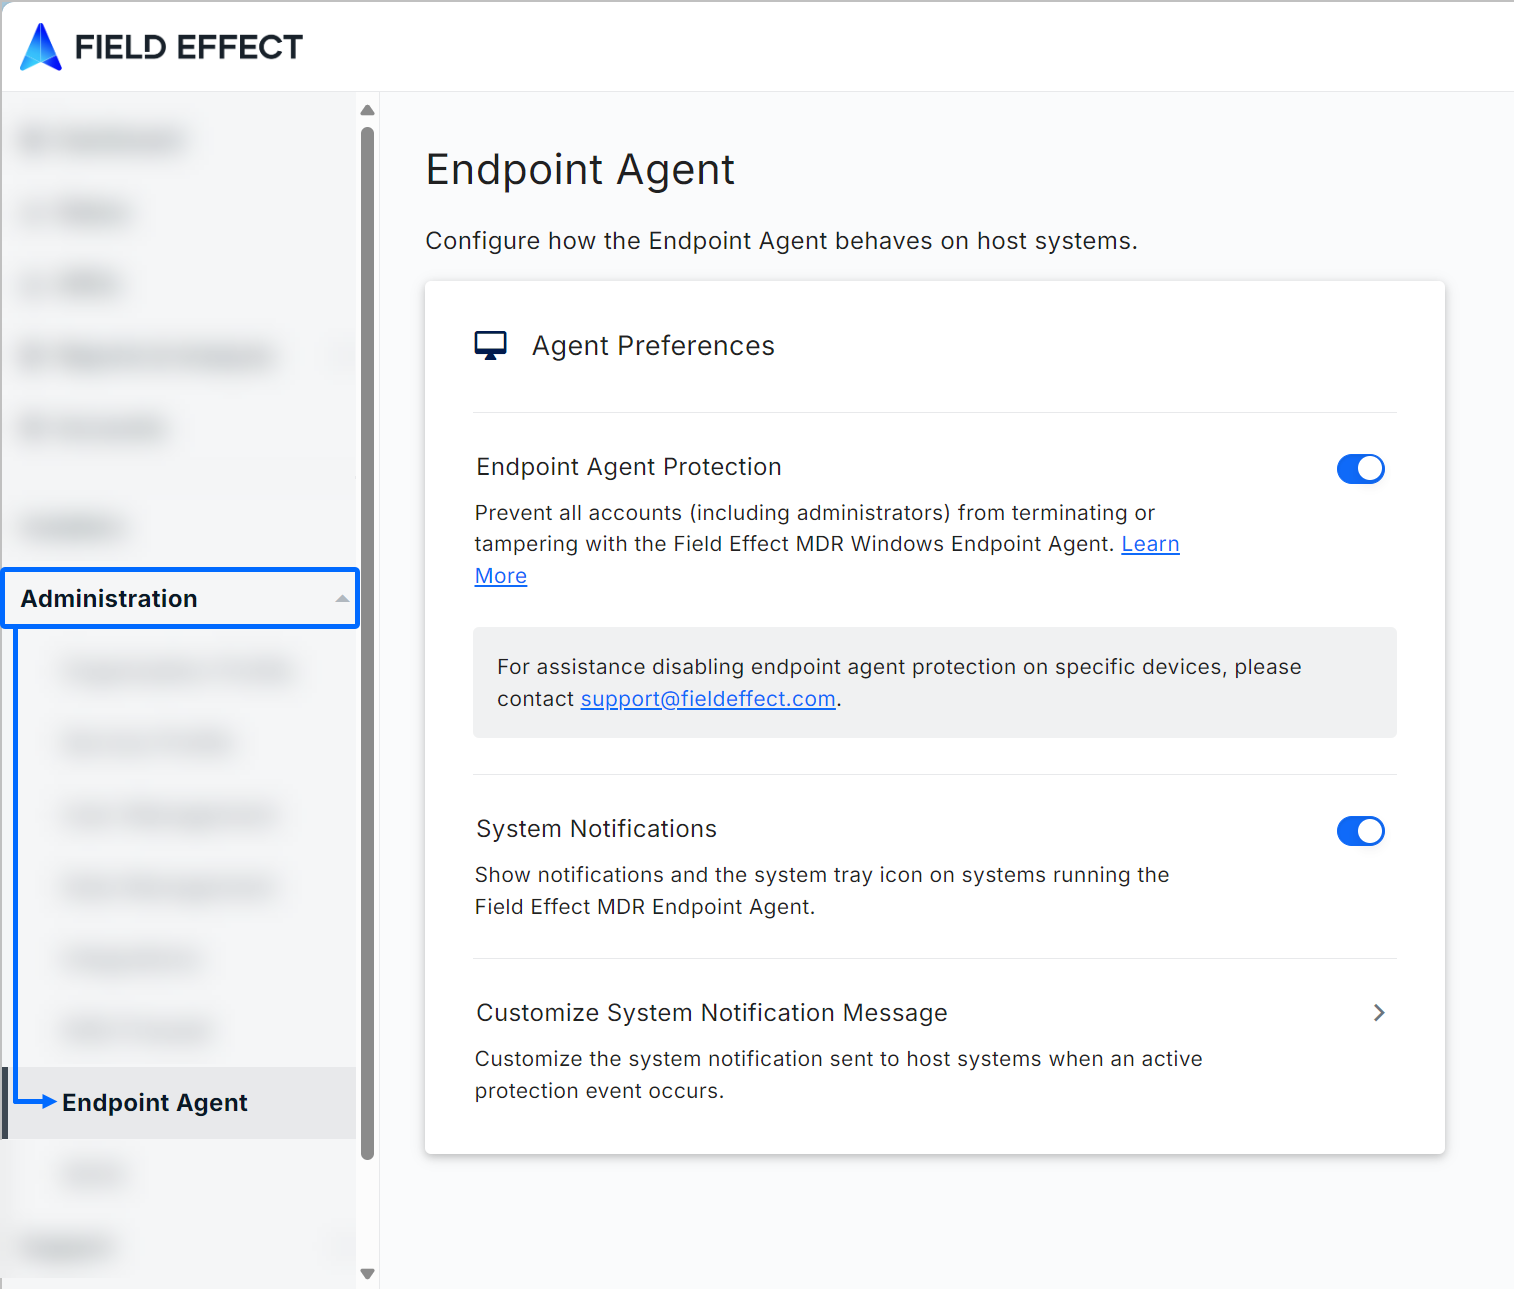
On the Endpoint Agent page (Administration section), you can adjust some preferences and behavior settings for endpoint agents installed on your organization’s devices. You can use the toggle switches to enable/disable settings, or click into a setting for more details (setting a custom notifications).
This article covers the following topics:
Endpoint Agent Protection
This feature is turned on by default and applied globally across all endpoint devices with our agent installed. If you need to disable Agent Protection for a specific endpoint, or set of endpoints, this can be done using the bulk editing feature found on the MDR Portal's Devices page.

Visit our Help Center article to learn more about bulk editing endpoint.
Agent Protection keeps the endpoint agent running perpetually and prevents any user accounts (including administrators) from tampering with the endpoint agent.
Agent Protection keeps the endpoint agent running perpetually and prevents any user accounts (including administrators) from tampering with the endpoint agent.
It protects against attempts to uninstall, terminate, or otherwise interfere with the Field Effect MDR service and driver. Here is what can be expected from this feature, given a few scenarios:
- Attempts to uninstall the endpoint agent through Add/Remove Programs will appear to be successful. However, the uninstall will silently fail and continue running. It will also remain in the list of installed programs.
- Attempts to stop the endpoint agent service through the Service Control Manager will fail with an 'Access Denied' error.
- Attempts to tamper with Field Effect registry keys will fail with an 'Access Denied' error.
- Attempts to stop or disable the Field Effect driver or service using sc.exe on the command line will fail with an 'Access Denied' error.
- Attempts to delete or rename Field Effect executables will fail with an 'Access Denied' error.
- Attempts to terminate the Field Effect process through the task manager or command line will fail with an 'Access Denied' error.
Disabling Endpoint Protection
When disabling endpoint protection for a device, please allow 30 minutes for the change to take effect.
After uninstalling an endpoint agent, it will appear on the Devices page for 60 days after it is uninstalled.
Disabling the feature globally
If you decide that you want to disable endpoint protection globally, then you can do so using the toggle.
Disabling the feature for specific users
If you need to uninstall our endpoint agent from a set device(s) use the Devices page's Bulk Edit functionality.
With bulk editing, you can disable agent protection for only the devices that servicing, while keeping the rest of your fleet protected. See our Help Center article on Bulk Editing Endpoints.
System Notifications (Active Response)
Active Response allows the Field Effect endpoint agent (v3.0 or later) to automatically take targeted and automated blocking actions against malicious activity at the process level. If Active Response triggers a response action on an endpoint device, a desktop notification will be generated for the end user. These notifications can be customized or disabled.
Notifications are available for the following scenarios:
- Field Effect detects a threat (ex: malicious software) on an endpoint device.
- Field Effect performs an action (ex: isolated from the network, rebooted, etc.) on an endpoint device.
- (Coming soon) A removable drive is detected and blocked on an endpoint device.
- (Coming soon) Disk scan results.
Notifications can be enabled, disabled, and customized from the Endpoint Agent page’s Agent Preferences section. Below is an example notification. This article walks through the process of customizing this notification.
Using System Notifications with Different Languages
Notifications support English, French, and Spanish, and the language is determined by the end user’s operating system settings. If the user has their operating system set to a supported language, the notification’s default message connect will be translated to their set language.
If you create a custom notification message, however, it will remain in the language it was written in.
Customizing the System Notification Message
The System Notifications toggle must be enabled to customize System Notification messages.
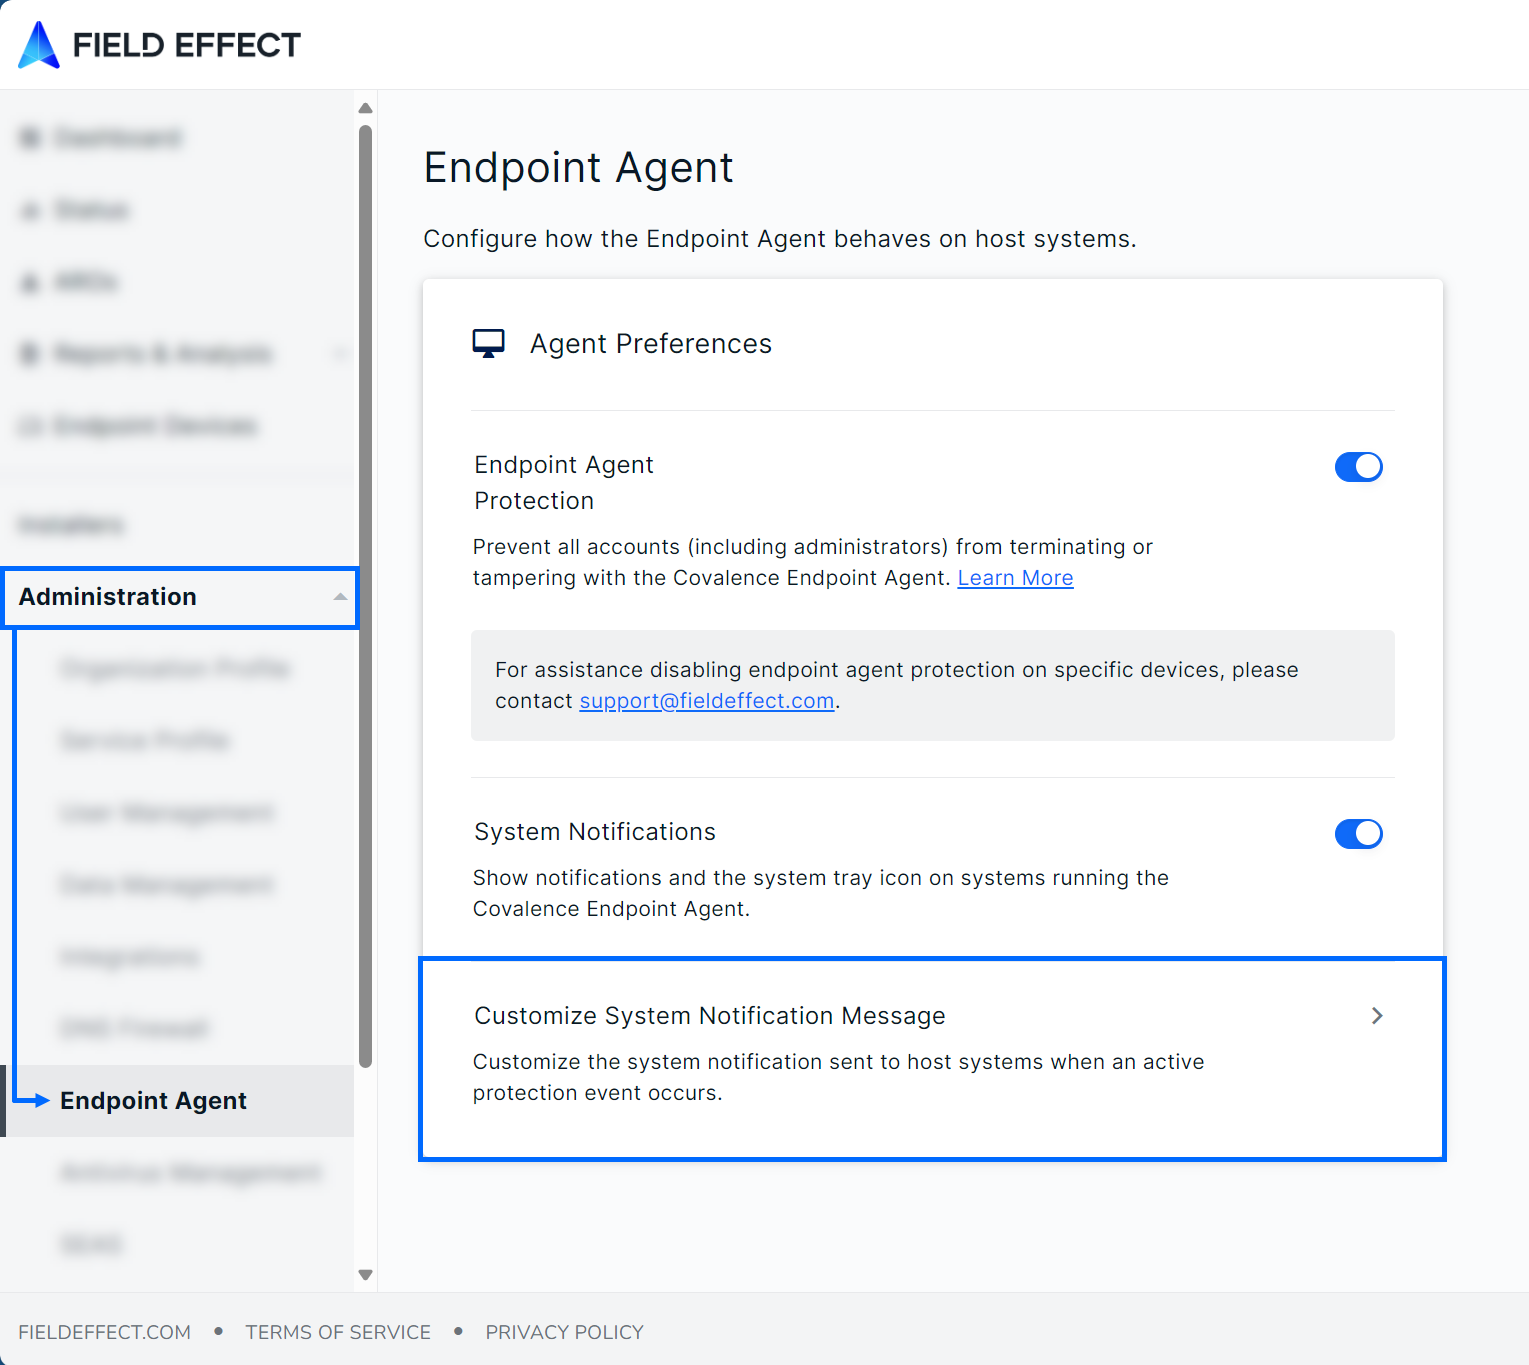
Navigate to the Endpoint Agent page (Administration section) and click Customize System Notification Message.
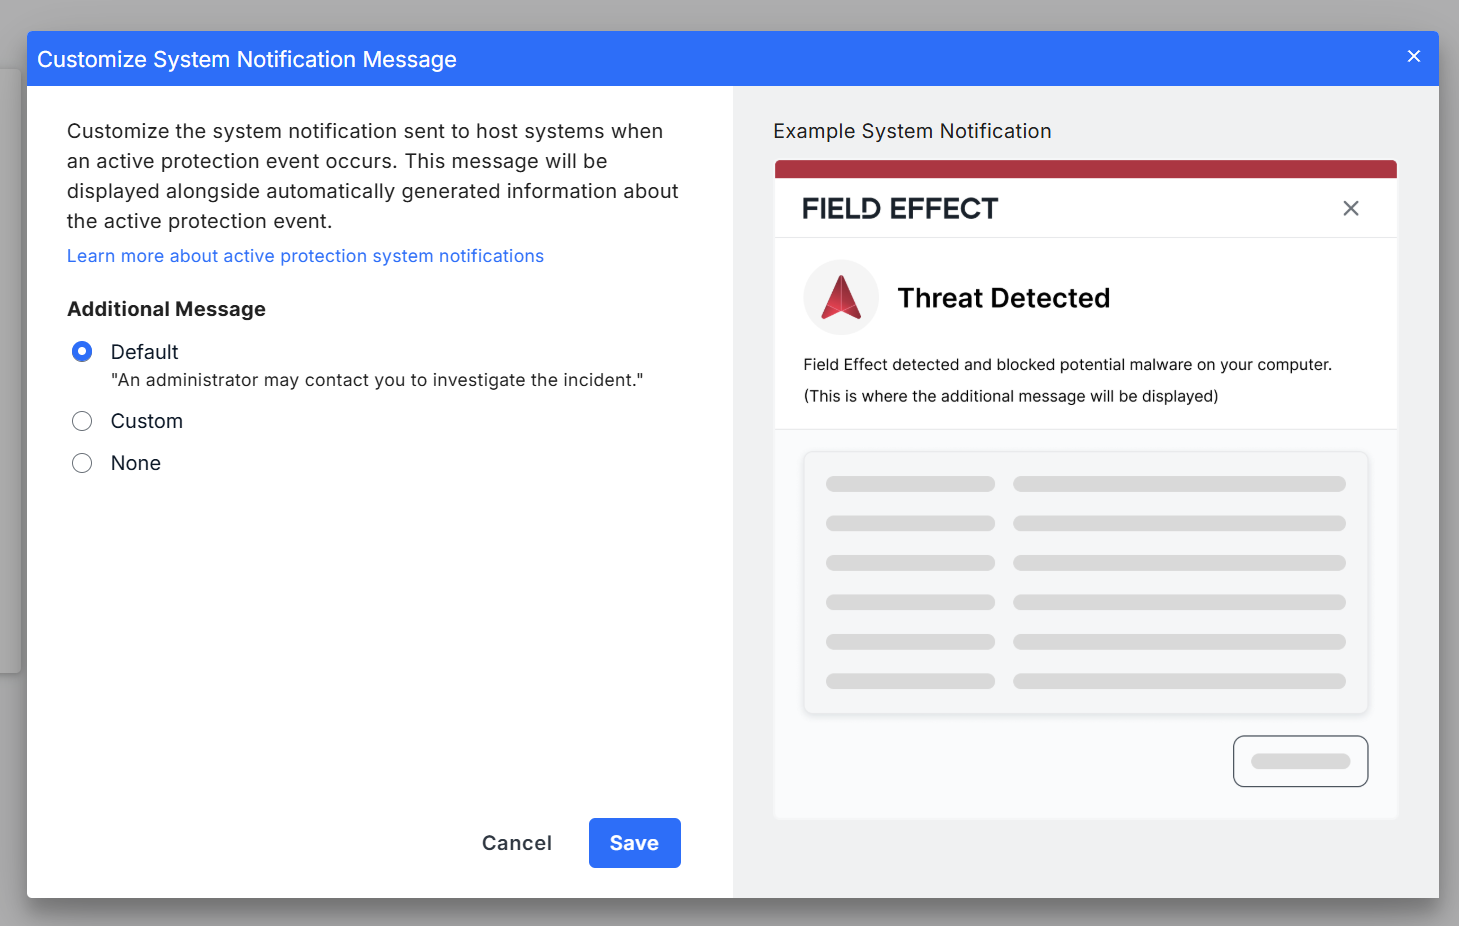
The Customize System Notification Message window will open. From here, you can choose to use the default messaging, custom messaging, or no messaging. The example below shows the messaging options available the messaging location in the notification is highlighted. If you select None, the highlighted area will be left blank. After making your selection, click Save.
Using the Default Message
To use the default message (“an administrator may contact you to investigate the incident”), select Default and click Save. The default messaging will then be shown in the highlighted area shown in the example above.
Using No Messaging
If you want to remove the message entirely, select None and click Save. No messaging will be shown in the highlighted area shown in the example above.
Using a Custom Message
If you want to create your own notification message, select Custom.
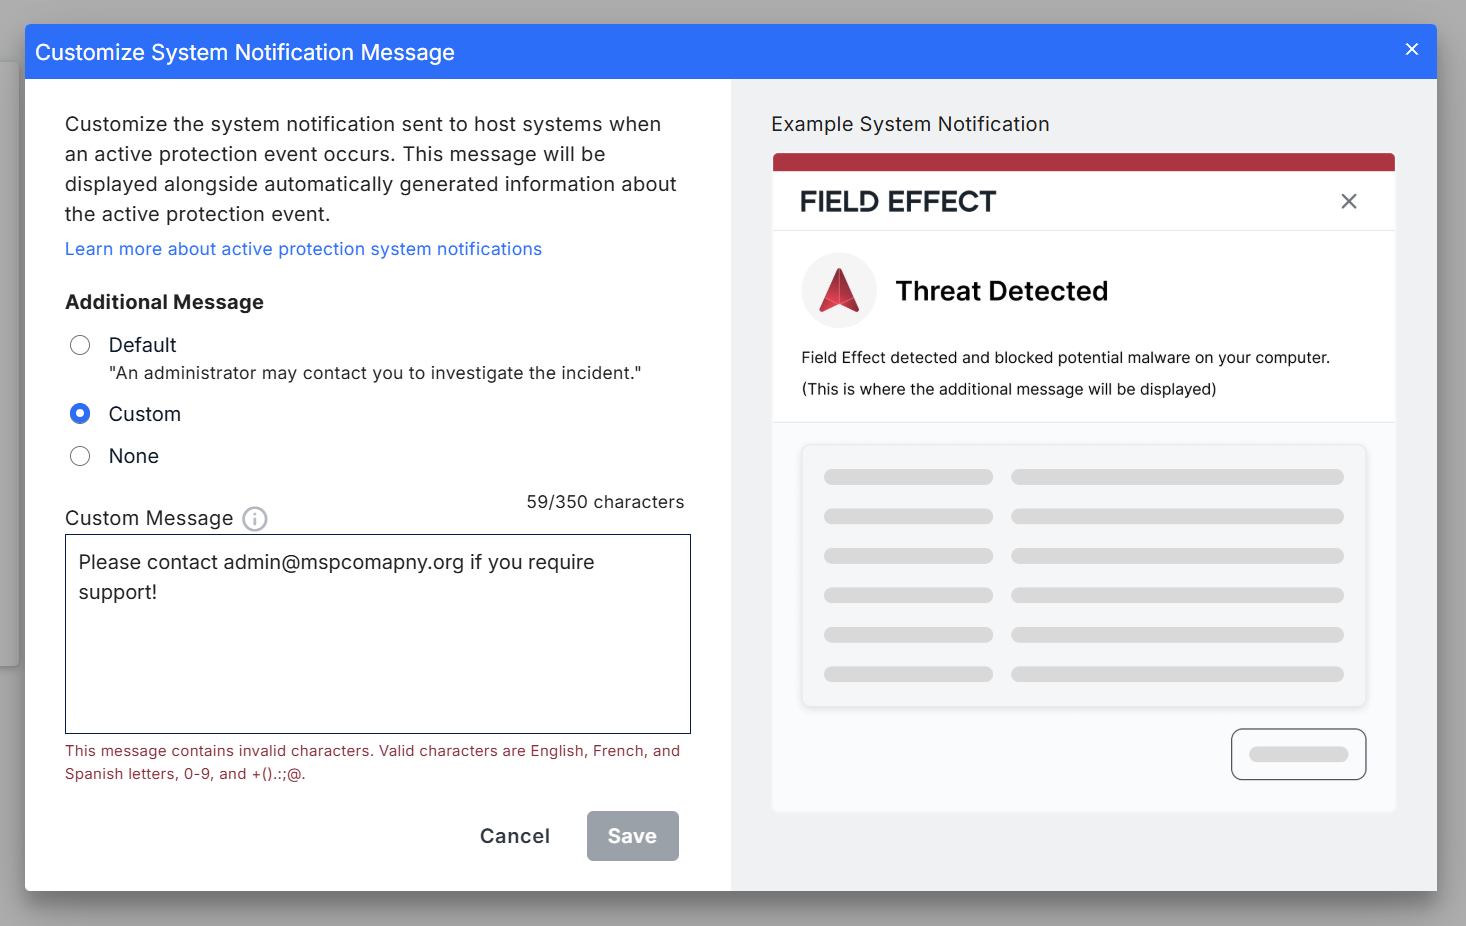
The Custom Message field will appear under the message options. Note that custom messaging has a 350-character limit, and some custom characters are unsupported (see Troubleshooting below).
Type your custom message into the field and click Save. Your message will be applied, and you will be taken back to the Endpoint Agent page.
Testing and Validating Notifications
If you want to receive a test notification to review and validate, Field Effect supports several workflows for sending test AROs and validating blocking capabilities.
To learn how to send a test notification, visit our Field Effect Endpoint Service Validation article and use the Notification Validation Test.
Troubleshooting
As mentioned previously, custom messaging has a 350-character limit. If you exceed this limit, you will not be able to save the message.
Also, some characters are not supported in the custom message. Using an unsupported character will produce an error (shown below) and you will not be able to save your message.
Supported special characters include:
- Alphabetical letters: a-z, A-Z
- Spanish letters and accents: Á, á, É, é, Í, í, Ó, ó, Ú, ú, Ñ, ñ
- French letters and accents: Ç, ç, É, é. Â, â, Ê, ê, Î, î, Ô, ô, Û, û, À, à, È, è, Ù, ù. Ë, ë, Ï, ï. Ü, ü
- Numerical characters: 0-9
- Special characters: “space”, “+”, “(“, “)”, “,” “,” “:” , “;” , “@”
Was this article helpful?
That’s Great!
Thank you for your feedback
Sorry! We couldn't be helpful
Thank you for your feedback
Feedback sent
We appreciate your effort and will try to fix the article