Introduction
Note for Partners: When the Organization Selector is set to the partner view, the details presented on this page refer to your organization. When set to a specific client view, the details on this page refer to the client organization. Ensure that the Organization Selector is set to the appropriate client before continuing.
The Service Profile's (Administration section) Monitoring Profile tab stores data about your organization’s IT infrastructure. The information you provide here allows Field Effect and our analysts to better understand, contextualize, and characterize the activity being monitored. It's important to know that some of Field Effect MDR's features, like the DNS Firewall and SEAS, require that this section be filled out. This should be completed while deploying the service.
This article covers the following topics:
Video Overview
What Consists of a Monitoring Profile?
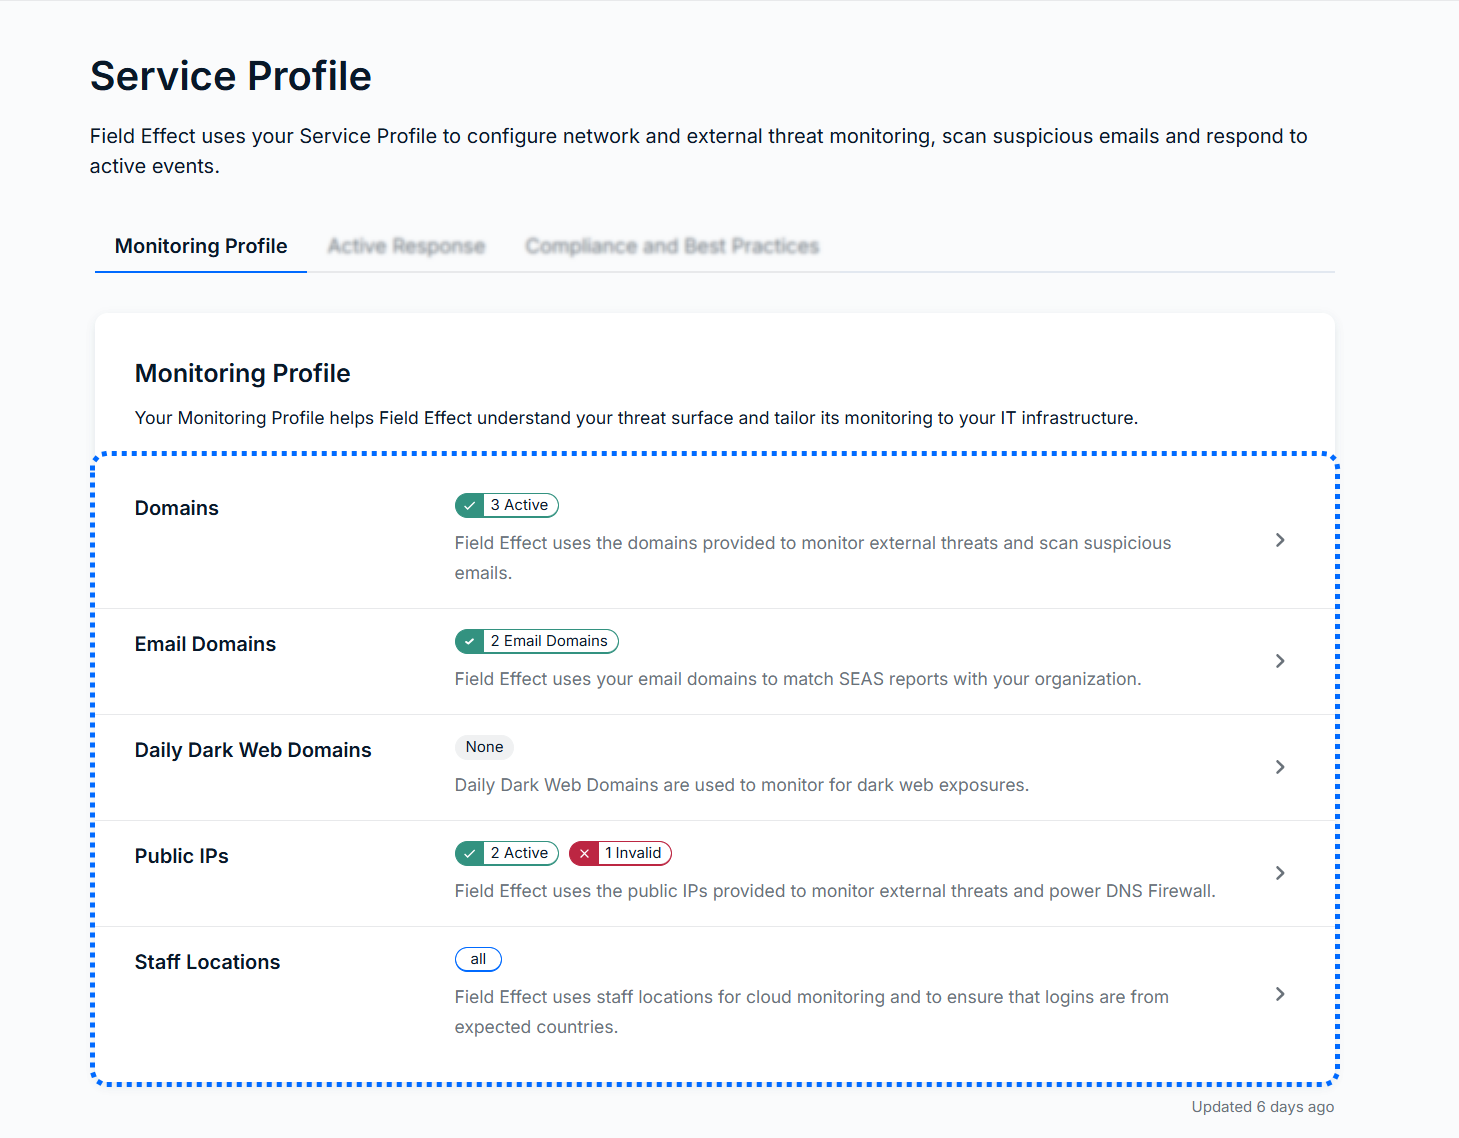
The Monitoring Profile is a specific section of your organization's Service Profile, and stores the following information:
- Domains: your organization's owned domains (ex: www.your_company.com). Field Effect uses this information to monitor for external threats to them.
- Example: Typo squatting is a common attack technique in which attackers leverage misspelled domain names. Using “www.fieldeffect.com” as an example, an attacker may register the domain “www.filedeffect.com” and try to drive traffic to this malicious site, misleading users into thinking they’re visiting the trusted Field Effect site.
- Email Domains: the domain(s) used for used for organizational email (example@your_comapny.com). This helps Field Effect match your domains to the appropriate SEAS reports.
- Example: SEAS allows users to submit any suspicious email they receive to the service. Once submitted, our analysts will evaluate the email and its contents, and report on it via the MDR Portal.
- Daily Dark Web Domains: you can assign email domains (above) as Daily Dark Web domains. Once assigned, Field Effect MDR will perform a daily scan of the dark web, and report any exposures via ARO.
- NOTE: This is an add-on feature. See Daily Dark Web Monitoring: Overview for more on this.
- Public IPs: your organization's public IP addresses**,** organized by location into connections (Headquarters, branch locations, etc.). This data helps power our DNS Firewall is a requirement to using the feature.
- Staff Locations: Field Effect uses this data to ensure that cloud account logins are coming from expected locations.
- If a user is logging in from Asia, for example, but you only have a North American presence, Field Effect MDR can identify the login as being potentially malicious and generate the appropriate ARO.
Filling out the Monitoring Profile
The following sections outline how to fill out each section of the Service Profile's Monitoring Profile tab. To get started, click on any of the sections (shown above) to open the edit window for that section.
Domains
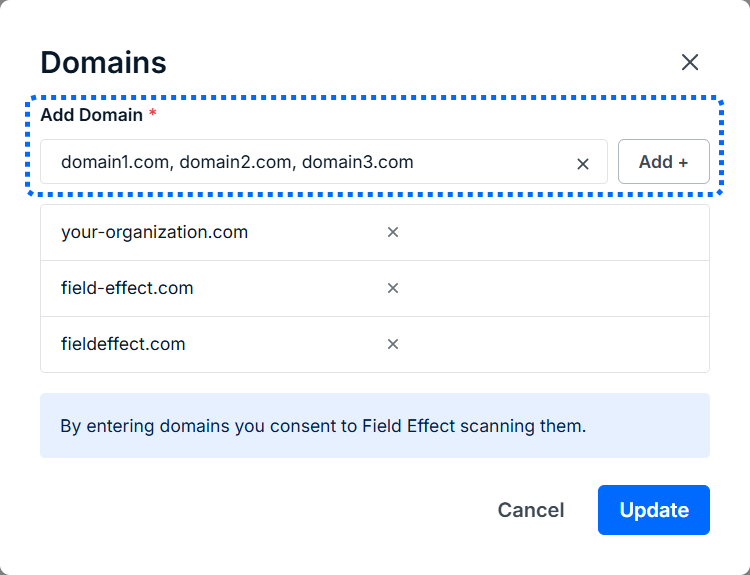
In the Domains edit window, provide your organization's domains in the text field and click the + Add icon to add them to your profile. You can add multiple domains at once delimiting them with a comma.
Added domains are listed in the window. Click the X icon in a row to remove that domain.
When finished, click Update to save your changes.
Email Domains
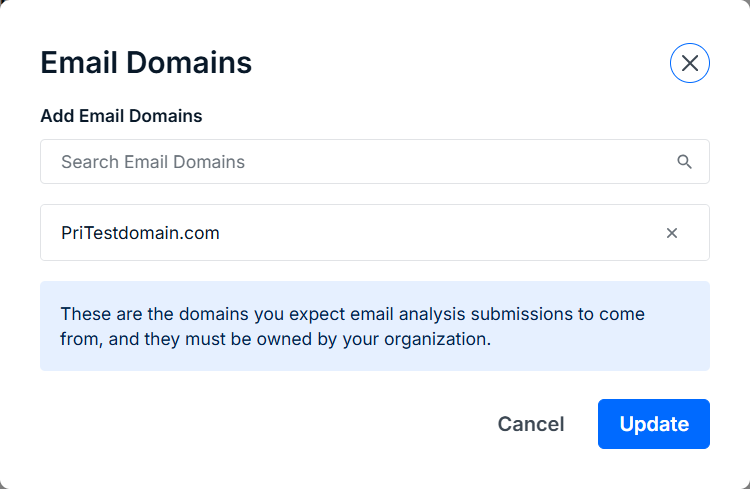
In the email domains window, search among previously added domains (see above) in the text field and select them to add them as an email domain. Added email domains are listed in the window. Click the X icon in a row to remove that email domain.
When finished, click Update to save your changes.
Daily Dark Web Domains
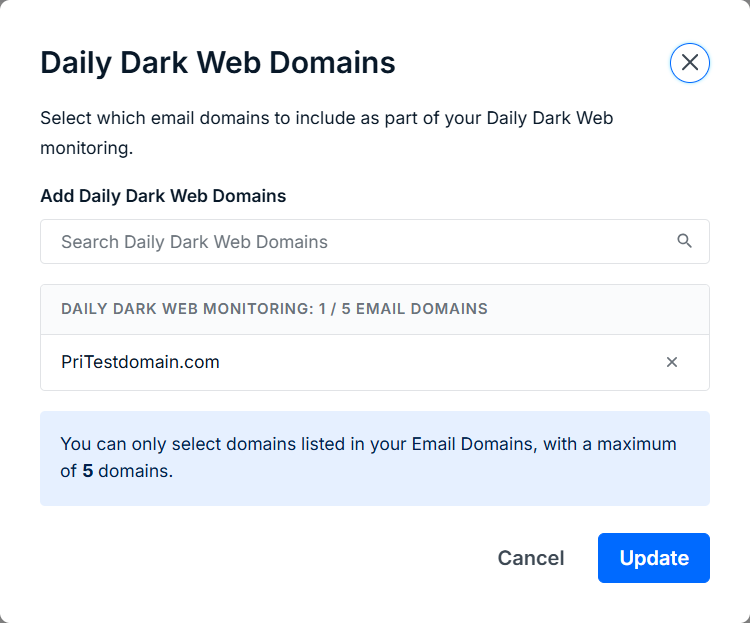
In the Daily Dark Web Domains window, search among previously added domains (see above) in the text field and select them to add them to Daily Dark Web Monitoring. Added domains are listed in the window. Click the X icon in a row to remove that email domain.
When finished, click Update to save your changes.
Public IPs
This is a requirement for our DNS Firewall.
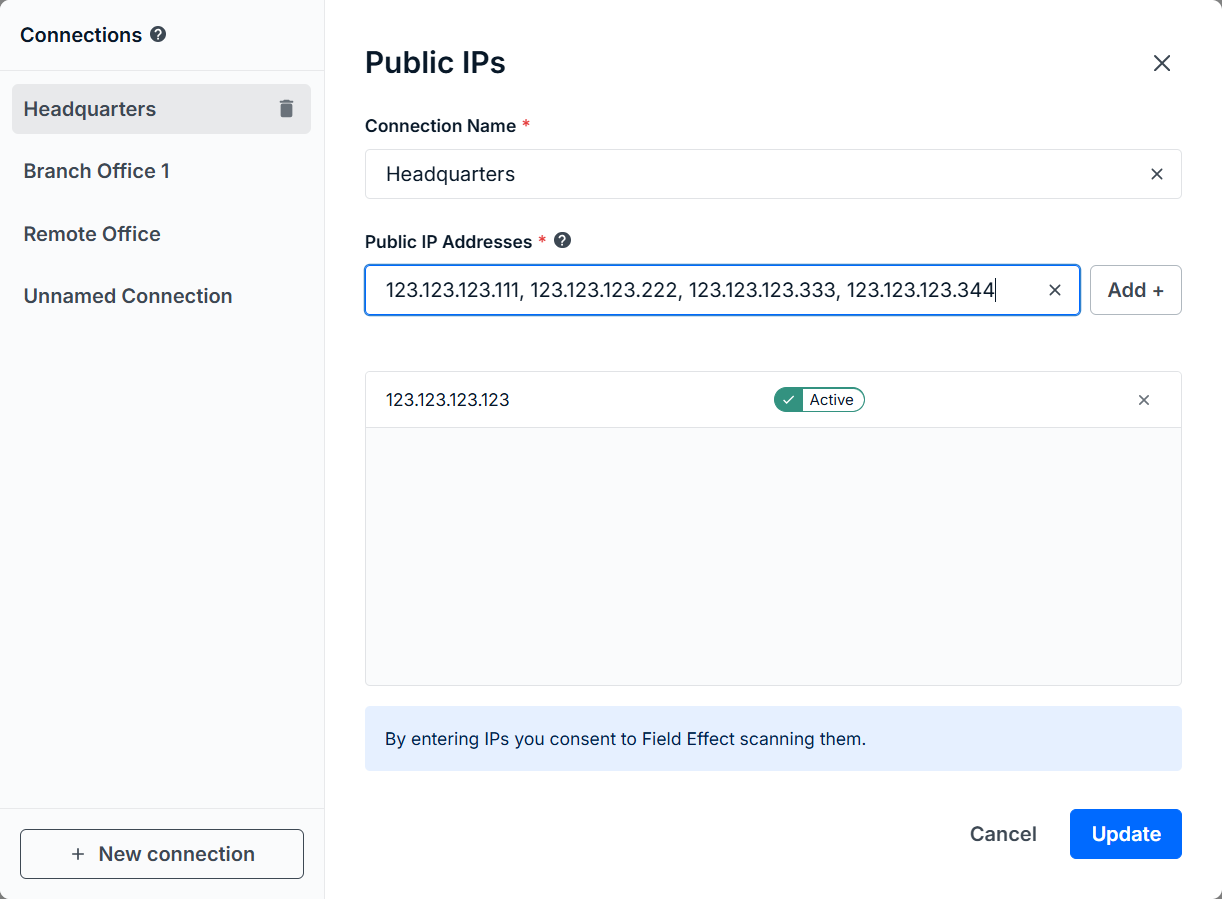
In the Public IPs edit window, the column on the left lists out our organization's connections, and the central pane displays details about the selected connection. A connection represents a group of devices at a single physical location. An example would be your organization's Headquarters and its network.
Begin by creating a connection for all your locations (Headquarters, branch locations, etc.) in the Connections column on the left. In each connection, give it the appropriate name, and add the public IP addresses for that network's gateway devices. To add IP addresses, paste them into the field and click Add + icon to add them to the connection. You can add multiple IP addresses at once delimiting them with a comma.
IP addresses added to each location are listed in the central pane. Click the X to in each row to remove that IP address from the connection.
When finished creating your connections, click Update to save your changes.
Staff Locations
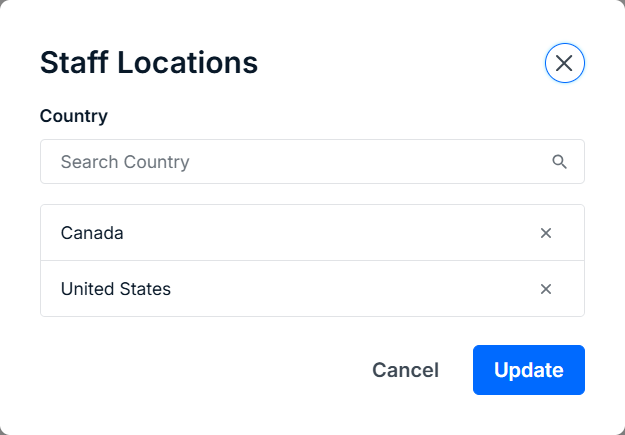
In the Staff Locations edit window, use the search bar to find and select countries that your organization expects routine traffic from. Selected countries will be listed below the search bar, and clicking the X for a country will remove it from your profile.
Was this article helpful?
That’s Great!
Thank you for your feedback
Sorry! We couldn't be helpful
Thank you for your feedback
Feedback sent
We appreciate your effort and will try to fix the article