Introduction
This article explains how to onboard a new customer to your volume license within the License Management Portal (LMP). Completing this process creates the customer account, allocates licenses, selects the appropriate deployment option, and submits the onboarding request for provisioning.
Audience: Partners and partner administrators responsible for onboarding customers through a volume license allocation.
This article covers the following topics:
- Before you Begin
- Begin the Onboarding Process
- Enter Customer Details
- Select a Deployment Option
- Next Steps
Before you Begin
Gather the following information before starting the onboarding process:
- Customer legal business name
- Customer website (optional)
- MDR Portal administrator email address
- Required MDR user allocation
- Required MDR Cloud user allocation (if applicable)
- Beauceron SAT user allocation (if applicable)
Begin the Onboarding Process
Important: If the customer is currently experiencing a security incident, ensure the appropriate incident response process is followed before proceeding.
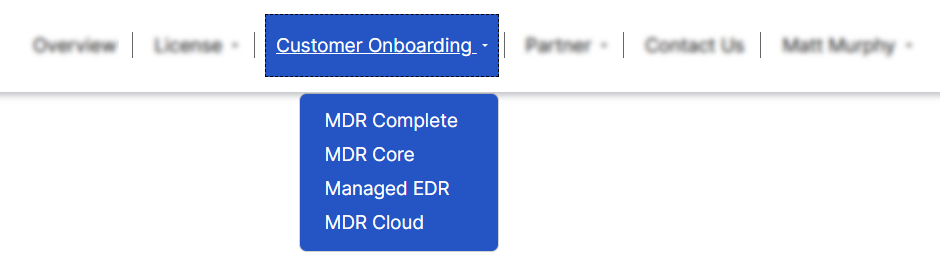
- Open the Customer Onboarding tab and select the volume license you want to use for the new customer.
- Confirm whether the customer is currently experiencing a security breach or active incident.

- Complete the onboarding form that appears.
Enter Customer Details
Provide the following customer information.
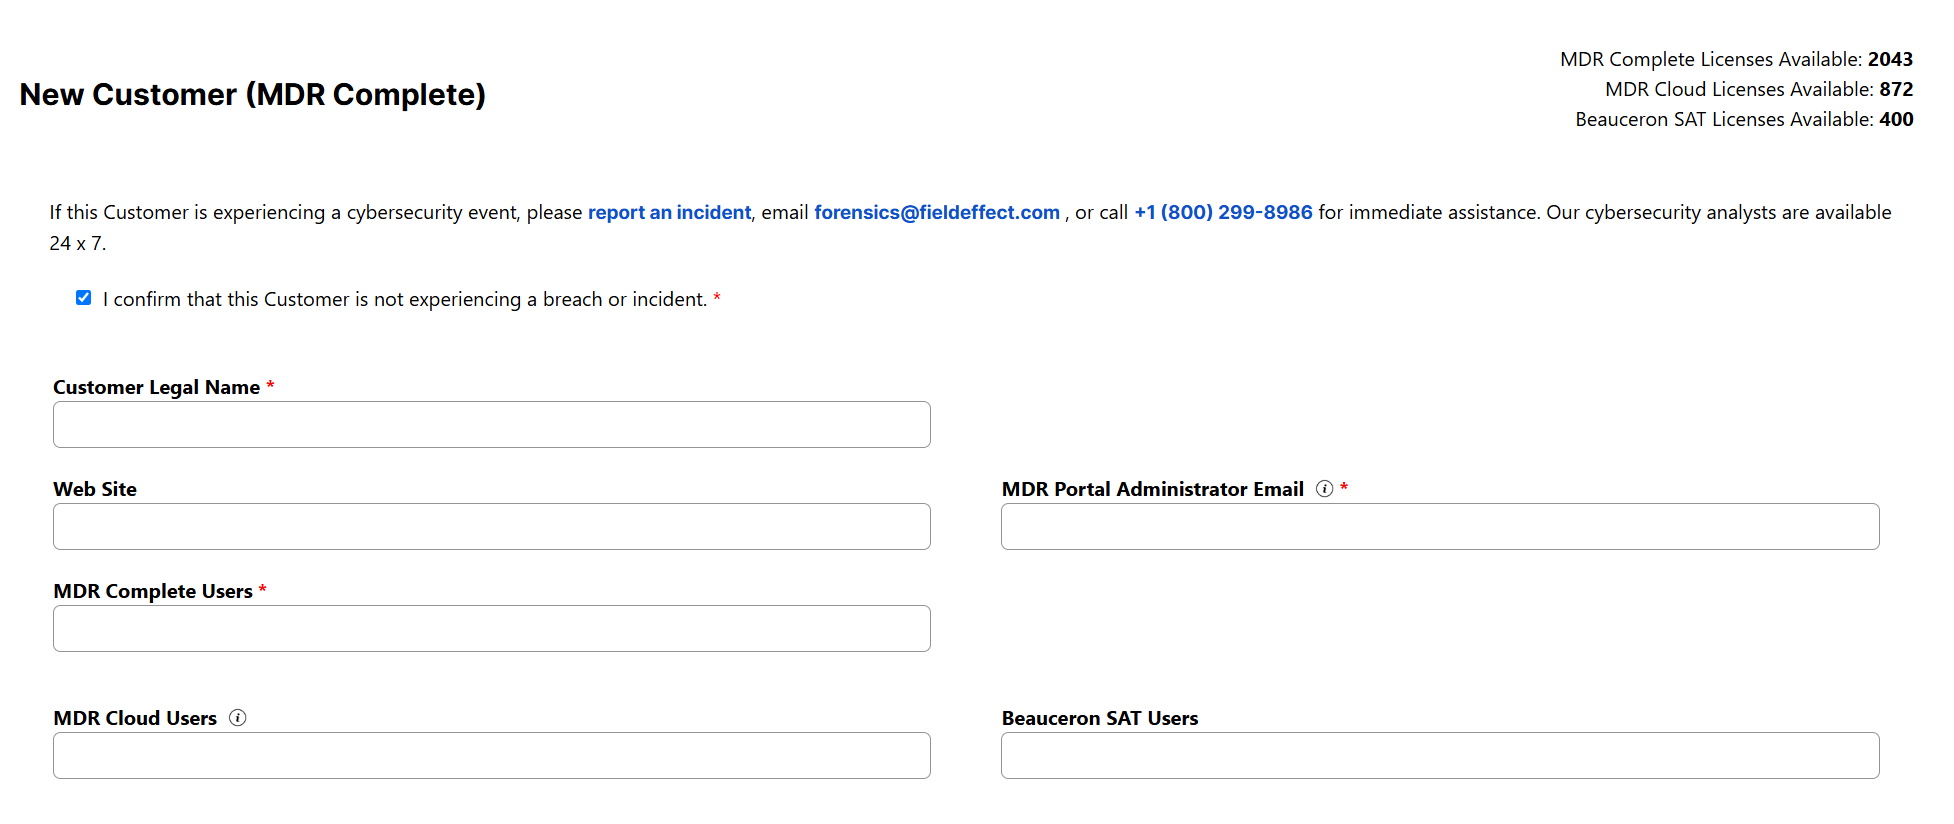
Customer Legal Name
Enter the customer's legal business name. This name becomes the customer account name throughout the MDR Portal and License Management Portal.
Website (Optional)
Provide the customer's website to assist with customer verification.
Sub-Partner
If multiple partner organizations share the same volume license allocation, specify the appropriate sub-partner. In most deployments, this field can be left blank.
MDR Portal Administrator Email
Enter the email address of the customer's primary MDR Portal administrator.
Important: This user becomes the initial administrative contact and receives instructions to create their MDR Portal account.
MDR Users
Specify the number of MDR users being allocated to the customer. The allocation is deducted automatically from the available volume license pool.
MDR Cloud Users
Enter the number of cloud-only monitoring users required for the customer. These allocations are separate from standard MDR user licenses.
Beauceron SAT Users
If the customer will use the Beauceron Security Awareness Training add-on, specify the required user count. This option is available with MDR Complete deployments.
Select a Deployment Option
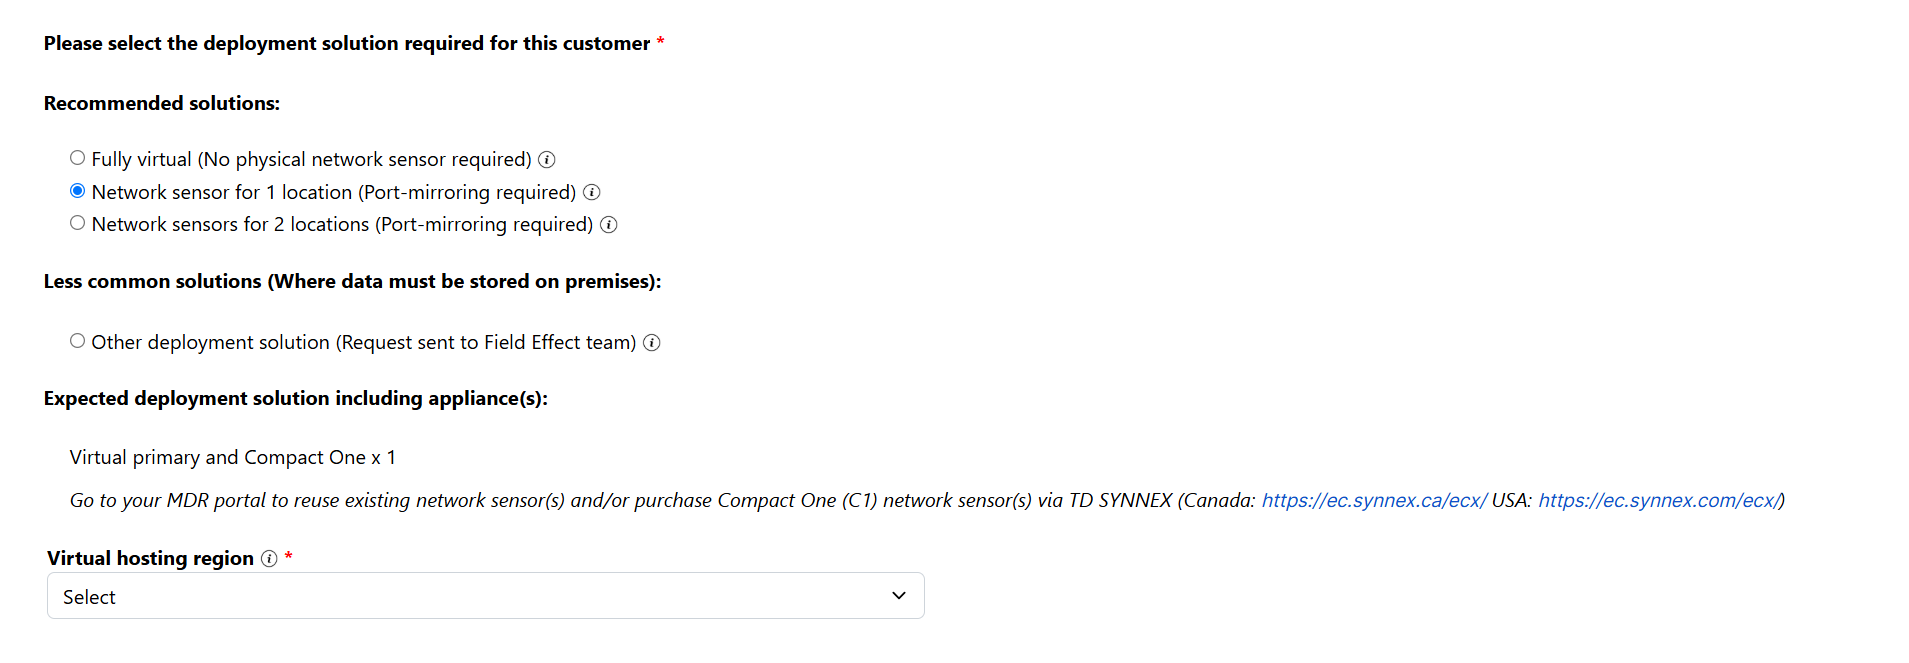
Choose the deployment option that best fits the customer's environment.
| Deployment Option | Recommended For |
|---|---|
| Fully Virtual | Customers who do not require network sensor to perform network packet analysis. |
| Network Sensor for 1 location | Customers requiring network monitoring at one location |
| Network Sensor for 2 locations | Customers requiring monitoring across multiple locations |
| Other Deployment Solution | Customers with a complex environment that requires additional Field Effect consultation. This will selection send a request for our team to reach out. |
Hosting Region
When selecting a fully virtual deployment, choose the appropriate hosting region for the customer
Network Sensor Solutions
If the customer's required deployment solution involves a network sensor, you will need to visit our hardware distribution partner, TD SYNNEX (Canada: https://ec.synnex.ca/ecx/ USA: https://ec.synnex.com/ecx/). From here, you can select the appropriate network sensor for the customer.
Next Steps
After the onboarding request has been processed:
- The customer account is created.
- License allocations are assigned.
- The MDR Portal administrator receives account setup instructions.
- Deployment activities can begin for the customer.
Was this article helpful?
That’s Great!
Thank you for your feedback
Sorry! We couldn't be helpful
Thank you for your feedback
Feedback sent
We appreciate your effort and will try to fix the article